Monday, April 25, 2011

Tomatoes, Tomatoes, Tomatoes!!!

It's been a few days since I've posted.  In that time, our garden has EXPLODED.  It absolutely loves this hot, humid weather we've had here in central Texas this last week.  As of last count, I have over 70 green tomatoes, 2 bell peppers, and at least 6 jalapeno peppers growing. 

I've decided growing your own vegetables is like Christmas for kids.  Every day, I go out and look at my "presents" and hope someday soon I can begin unwrapping them!  After smelling my green tomatoes, I got so depressed by store tomatoes that I didn't buy any during my weekly grocery shopping last week.  I later regretted this decision, because a sandwich is next to WORTHLESS without tomatoes on it, even crummy store bought ones. 

There will be some new cooking posts this week as well.  On the menu is ribs, chicken stuffed with shrimp, and shrimp kabobs.  (can ya tell I like buying one ingredient and making multiple meals?)

Until next time, here's some pictures of the developments in the garden.  The white powder is Sevin Dust.  Something's been tearing my poor peppers to pieces, so I put a little on the whole garden since we're a ways away from harvest.  The stuff works!  My leaves are looking a little more intact and less nibbled on. 


Only one of our squash plants is acting like its going to make it.  Here it is next to its fallen comrade.

Monday, April 18, 2011

Haitian Voodoo Sticks

Grilled up something rare in our house: red meat.  My wife grew up in Colorado and didn't eat red meat until she moved to Texas (where it's against the law to be a vegetarian.  At the very least, we won't let you become a citizen until you've enjoyed a good steak).  These spicy kabobs were simple and tasty with just enough kick to be enjoyable. 
Ingredients list:
1 beef bullion cube
1/2 cup water
3 cloves fresh minced garlic
2 teaspoons of cayenne pepper (note: this gave a decent kick.  If you crave hotter stuff, add more.)
1/2 teaspoon of salt
1 teaspoon of black pepper
1 1/2 lbs of sirloin, cubed
3 bell peppers, cut into skewer sized pieces

Combine everything but the peppers, and marinade for at least 2 hours.  We let it sit for 4 hours.  As with most non citrus marinades, the longer, the better.  Grill over medium high heat. 

As a tip for kabobs, we always grill all the meat on one, veggies on another, etc keeping like items together.  Veggies take longer to grill than meat, so if you try to combine a pretty one, you'll wind up with undercooked meat, burned veggies, or if you're having a really bad grill day, both.  It is simple to recombine ingredients after they are cooked if you desire "pretty" kabobs. 

Today, however, we just dumped them off the kabobs into a bowl of brown rice and served, which works as well.  Still drinking the Shiner 102 from my previous post. 


Leftovers and grilled peppers

I had some left over taco meat from the Mexican Grilled Pizza I made, so I decided to make soft tacos with a side of grilled peppers and topped with homemade guacamole.  I won't bore you with how to make soft tacos, because its really not hard.  Thankfully, neither is this simple grilled peppers recipe.  I look forward to repeating it with homegrown bell peppers and jalapenos in a few months, but for now I'm stuck with store bought. 


Ingredients list:
Bell peppers, wedged
Jalapenos, sliced
Mozzarella cheese

That's it!  Grill the Bell peppers face down, then flip, add jalapeno slices and top with mozzarella.  Grill until melted, and eat.  My dinner was topped off with a Shiner 102, a double wheat made to celebrate the Spotzel brewery's 102nd year of operation. 

A Year later...

We closed on our house a year ago this month.  We've taken pictures of the backyard as we went, and I dug up some today.  It's amazing what you can accomplish with a little hard work in a year.  All the grass is from seed, and yes, the weeds were really that high when we moved in officially in August.  I literally was taking a machete to some of the weeds, they were so thick.  So, a pictorial of how a yard can change in a year:


Here's to another great year of yard improvements!

Tuesday, April 12, 2011

Pizza on the grill

This was dinner tonight:

Pizza on the grill. Before we get into ingredients, a piece of friendly advice. Make the pizza dough at least an hour before you want to grill.  I made the mistake of not knowing what I was doing regarding homemade dough and we ate at 8pm instead of our usual 7ish.  Keep your spouse and kids less grumpy, and prepare the dough beforehand!  Dough can even be made the day before and refrigerated. 


This is for 8 individual sized pizzas

  • 3 1/2 cups all-purpose flour, or as needed
  • 1 envelope Fleischmann's® Pizza Crust Yeast
  • 1 tablespoon sugar
  • 1 1/2 teaspoons garlic
  • 1 1/3 cups very warm water
  • 1/3 cup olive oil
  • Additional flour for rolling
  • Additional oil for grilling
  • Pizza sauce
  • Other toppings as desired
  • Shredded mozzarella cheese
I recommend making the dough using this handy youtube video if you are like me and have never "rolled your own" as it were.This is how mine turned out before putting it on the grill:


The dough is the hardest and longest part of this ordeal.  After you have it rolled out and flatted ( I really recommend individual size pizzas.  They're just easier to get on and off the grill.  If you're a hungry type like me, just make 2 small ones.  You'll thank me when your pizza doesn't fold like a cheap card table and dump all your toppings through the grate) heat the grill on medium high.  Put the crust on the grill until the bottoms are lightly browned and firm.  At this point, take them off, flip them over, and put your choice of toppings on the grilled portion.  Then, carefully return the pizza to the grill until it's cooked though. 

I made a Mexican pizza by browning up some turkey, adding taco seasoning, then adding the taco meat to jalapenos (unfortunately too early in the year for them to be from my garden), mozzarella cheese and a "fiesta blend" cheese.  My wife topped hers with the yummy classic of pineapple and mozzarella.

Maybe next time I make this I'll get bold and try to make a "stuffed crust" pizza.  Until then, here's a closeup of my Mexican pizza.

Until next time, shoot safe, grill weekly and go have fun in the garden!

.357 snubby

Continuing the .357/.38 theme that my first gun post (Marlin 1894c) , today I'm going to talk about my pocket pistol and occasional back up gun, a Taurus 650CIA in .357.  This gun fulfills all of my requirements for a good pocket pistol.

A good pocket pistol must be
  • chambered in an effective round (for some, this would start at .380.  For me personally, .38 is the minimum.)
  • have a stainless finish to withstand rigors of things like and gardening sweat from the Texas heat
  • be reliable
 I'd say this fits those requirements quite admirably:


My 2 preferred carry methods for this .357 are either a pocket holster, or an ankle holster.  Waistband holsters are made for revolvers, but I personally think that if you can wear something on the waist, you should carry something with a little more capacity and possibility of easier reloads.  

The snubby with its 2 homes when we travel: A pocket holster and ankle holster:


If I'm wearing nice slacks and a tucked in shirt hat won't conceal a 1911 too well, I'll go with the ankle holster.  The pocket holster gets called into duty if I don't feel like putting on a gun belt, holster, reloads, etc etc to run a quick errand or take the trash out to the curb. 

I also carry 10 rounds in 2 bianchi tuff strips.  Though the reload is not as fast as a semi auto, with practice you can reload from the strips quickly.  


Is a 5 shot revolver the ideal carry piece?  I don't think so, but it provides a comfy medium between a full sized service pistol and no gun at all, and 5 shots of .357 is a heck of a lot better than nothing in my book.

Until next time, shoot safe, grill weekly and go have fun in the garden!

Thursday, April 7, 2011

Thai Chicken Satay w/homemade peanut sauce and zucchini

Finished product:


 Ingredient lists:
 Chicken Satay
  • 1/2 cup canned coconut milk
  • 1 1/2 teaspoons ground coriander
  • 1 teaspoon yellow curry powder
  • 1 teaspoon fish sauce
  • 1/2 teaspoon chili oil
  • 1 pound skinless, boneless chicken breast halves - cut into strips
  • 1 tablespoon chopped fresh cilantro
  • 1 tablespoon chopped unsalted peanuts
  • 12 wooden skewers, soaked in water for 15 minutes
  • 1 cup prepared Thai peanut sauce
Thai peanut sauce
  • 1 cup fresh-tasting dry roasted peanuts, unsalted
  • 1/3 cup water
  • 2 cloves garlic, minced
  • 1/2 tsp. dark soy sauce
  • 2 tsp. sesame oil
  • 1/2 to 2 Tbsp. brown sugar, to taste
  • 2 to 2.5 Tbsp. fish sauce - for vegetarians: substitute 2.5 to 3 Tbsp. regular soy sauce
  • 1/2 tsp. tamarind paste OR 2 Tbsp. lime juice
  • 1/2 tsp. cayenne pepper, OR 1 tsp. Thai chili sauce (more or less to taste)
  • 1/3 cup coconut milk
Thai zucchini


  • 1 garlic clove, minced

  • 1 teaspoon minced fresh ginger

  • 1 pinch dried crushed red pepper flakes

  • 2 teaspoons olive oil

  • 1/3 cup finely chopped unsalted dry roasted peanuts

  • 3 teaspoons chicken broth

  • 3 teaspoons rice vinegar

  • 2 teaspoons soy sauce

  • 1 pinch sugar 

  • 3 medium zucchini, cut into very thin strips


  • Now that the shopping list is out of the way, first thing we need to do is create the marinade for the chicken.  You're going to want this to sit covered in the fridge for at least 30 minutes, but preferably 2 hours.
    Stir together the coconut milk, ground coriander, curry powder, fish sauce, and chili oil. Add the chicken breast strips, and stir to coat. Cover and put in the fridge.  


    Next you're going to want to get the Thai sauce together.  Take everything in the ingredient list for the sauce and throw it all in a processor.   Afer its smooth, taste and adjust to your palette.  Want it more salty, add fish sauce.  Sweeter, more suger.  You get the idea.

    All the ingredients together before the food processor:
    And after its been run through the processor:


    When its getting close to grill time, you might be better off with a partner to do the veggies while you grill so they'll be done at the same time.  If not, that's okay.  I'd attack the veggies first, then grill the meat.  They'll stay hot because it won't take long to brown up the chicken.

    As a Texan, you should always have a "grilling beer" when you grill.  My choice today was a Shiner Bock, a Texas beer brewed in Shiner, Texas.  If you've never tried one, you need to.
     

    Cook garlic, ginger, and red pepper in oil in a large skillet over medium-high heat for 1 minute, stirring constantly.  Add peanuts and next 4 ingredients, stirring well.  Add zucchini, and cook, stirring constantly, for about 5 minutes, or until crisp tender.

    As for the chicken, preheat the grill on high, and discard marinade.  Cook the chicken 2-3 minutes per side, maybe more if you got thick breasts.  Basically, grill until they're cooked though...pretty simple.  

    I like to serve all this on a bed of rice, but you can certainly do without the rice. Also, red wine complements this meal perfectly!
    Until next time, shoot safe, grill weekly and go have fun in the garden! 


    Wednesday, April 6, 2011

    First gun post, a Marlin 1894c

    For my first gun post, I wanted to show off one of my favorite rifles, a Marlin 1894c chambered for .357/.38.

    Why an old school design like a lever gun?  In some places, semi automatic modern rifle designs such as the AR-15 and AK-47 variants are verboten by the local "that gun looks too scary" ninnies.  Thankfully, I'm in Texas where that's not a problem, and I'm sure I'll post later about my love for all things Kalashnikov. For those stuck in non free states like Kalifornia, however, a lever gun is a non threatening looking design, that has a decent capacity (this model can carry 9 in the tube), a proven history and isn't banned by nannystaters.  

    This one was purchased for 2 reasons.  The first reason was I already owned a .357 revolver at the time, and I like the idea of having more than one gun that uses the same caliber.  The second and more important reason was an attempt to find a gun my wonderful wife would feel comfortable using if she had to defend herself and I was away.  She's a diminutive 5' tall, doesn't like the recoil of my pistols, and thinks my AK is too heavy.  If that's not reason enough to buy a new gun, I don't know what is! 

    Because the Marlin is light and points naturally, it's something she actually feels comfortable handling.  In addition, loaded with .38s, the recoil is minimal.   As an average rule of thumb, a pistol caliber like the .38 will see about a 300 fps increase in velocity when fired out of a 16 inch rifle over a handgun length of 4 to 6 inches.  So even with recoil friendly .38s, this carbine should be capable of handling any situation she might need it for.

    One more good reason to own a lever gun (as if we need MORE reasons) is the fact that they're beautiful rifles and an important part of American gun history.  From the Spencer rifles of the 1860s to my Marlin produced in the 21st century, lever guns have been owned and used for personal protection, war, and pure enjoyment for 150 years here in Texas.  That's a good enough reason for me.


    Until next time, Shoot safe, grill weekly, and go have fun in the garden!

    Monday, April 4, 2011

    Our first garden

    Gr0wing up, my parents always had tomatoes growing in the backyard. The difference in taste between homegrown and store bought tomatoes is kind of like the difference between a Honda Civic and a Mercedes CL65 AMG . Yes, they're both technically cars, but its hard to enjoy the Civic after driving the AMG. I feel the same way about tomatoes. Yes, what you buy in the store is technically a tomato....but it doesn't compare to the taste of homegrown.

    With that in mind, we put in a garden this year to the house we purchased last year.

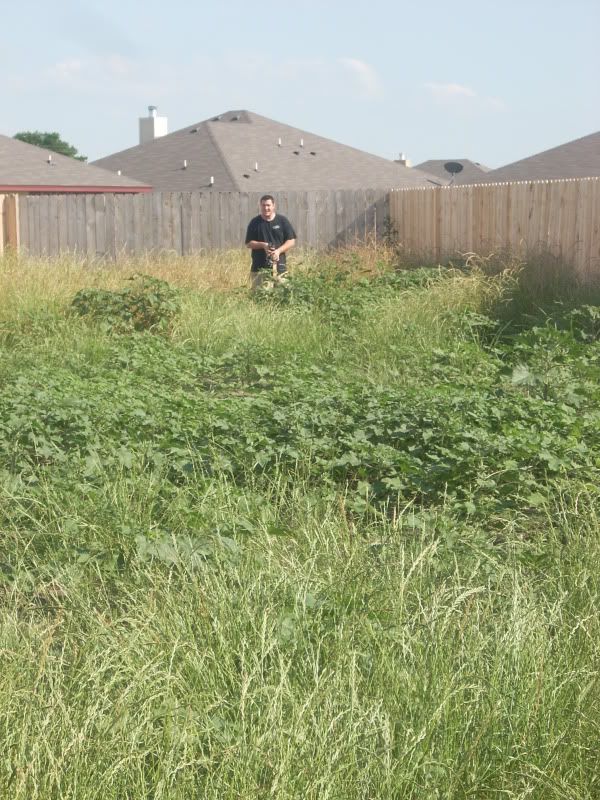
    Because central Texas soil in our area is about 99.9999% pure clay, we chose to build a couple of raised beds for our garden and bring in garden quality composted soil.

    We decided on 2 4x8 foot beds built with 2x6 boards, one for tomatoes and one for peppers and squash. After laying boards down in the approximate location, I put out some sand to mix in with the clay for better drainage and turned the soil to a depth of about 6".


    The next fun task was filling the newly built raised beds with a cubic yard of composted soil. After many lemonade breaks and with my muscles promising a fun morning, we finally got it all put together.


    Now it was time to plant! After an always amusing Wal Mart trip (If you don't think Wally World visits are fun, I recommend you check this site out: www.peopleofwalmart.com ) , we returned home with our retinas thankfully intact and 8 tomato plants, 7 pepper plants and 3 squash plants in tow.

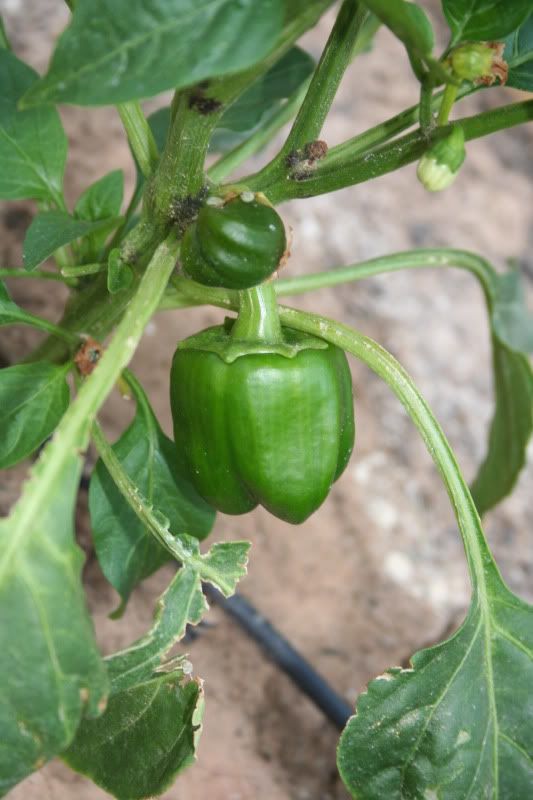
    Our tomato varieties: 2 Celebrity, 2 Grape tomato, Better Bush, Better Boy, German Queen, and Superfantastic. The peppers consist of 1 each green, yellow and red bell peppers, 2 jalepeno peppers, 1 serrano, and 1 anaheim pepper plants.

    As they were planted, Tomato bed first, then peppers and squash:
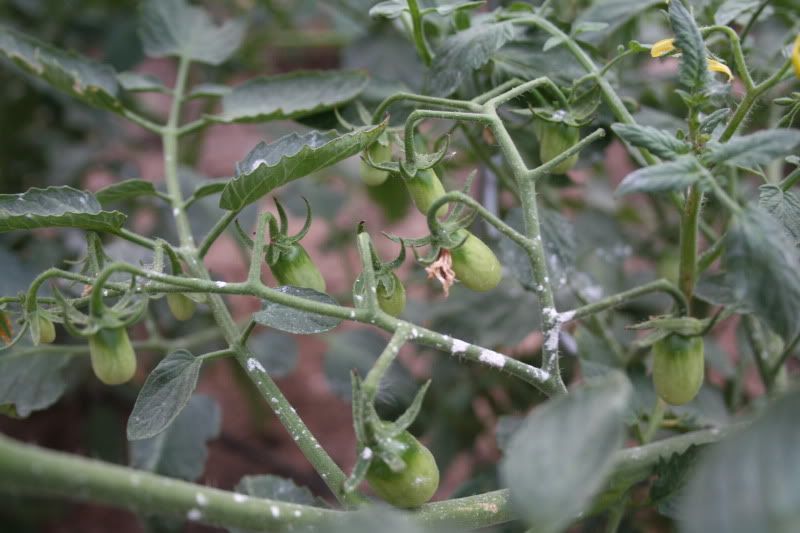
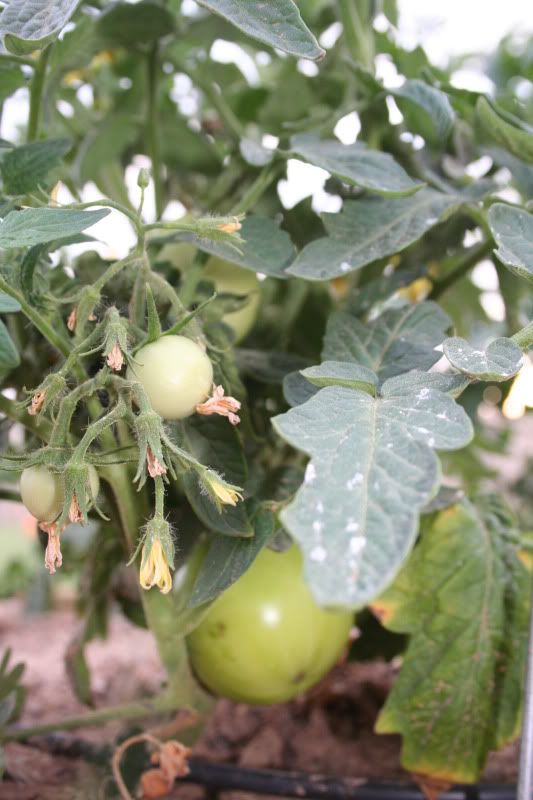
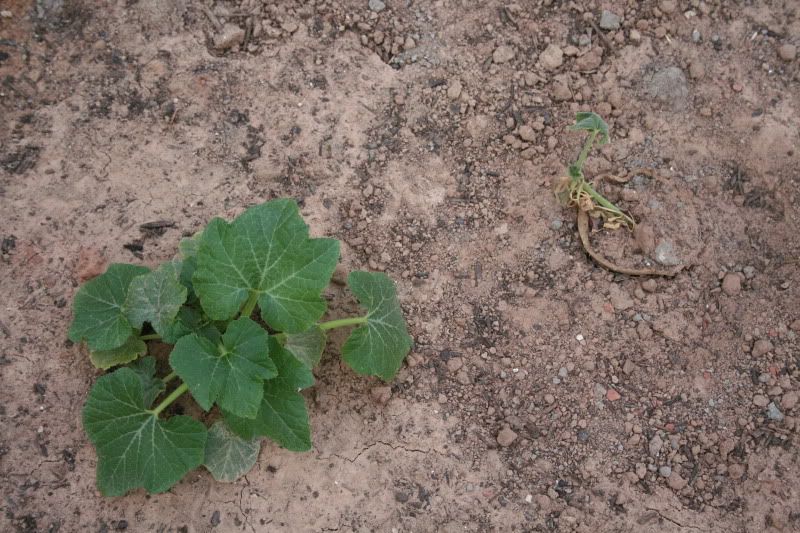
    Now that its 3 weeks later and I'm finally blogging, the tomatoes are showing tremendous growth. The peppers are looking pretty decent as well, and the squash are busy trying to die on me, because I've been essentially waterboarding them. (Hint: squash don't need as much water as tomatoes do). I also got drip irrigation installed, and we have our first tiny green tomato.


    So far, our German Queen is looking the best, with strong stalks and nice big leaves.

    This is the Better Boy tomato variety. Ironically, it is our sorriest looking plant, which just a week ago would have received my prestigious Most likely to Die First in my Garden award, was the first to produce a tomato, and has passed on the crown of Most Likely to Die First to the terrorist squash I've been waterboarding.

    Until next time, Shoot safe, grill weekly, and go have fun in the garden!